Online Auto Company
Company
Shop By Category
T&Cs
Shop Online
  • Free delivery across Ireland on orders of €100 or more
  • Interior, exterior and roadside car accessories in one place
  • Dispatch within 2 working days, then delivery in up to 7 working days by tracked courier
  • Tracking number emailed as soon as your order ships

Headlight Restoration Kit | Headlight Polishing Kit | Headlight Cleaner Kit

Headlight Restoration Kit

€37.99 €45.99 Save €8
  • Three Stage Method
  • No Power Tools
  • UV Sealant Finish
  • Fits By Lens Type

Price: €37.99 €45.99

  • Delivery time: up to 7 working days by tracked courier, after dispatch within 2 working days
  • Free delivery across Ireland on orders €100+, otherwise a flat €25
  • Pay by card or PayPal, handled by the payment provider
  • 15 days to change your mind, plus a repair, replacement or refund if it arrives faulty
Product specifications
Product TypeHeadlight Restoration Kit
MethodClean, polish, seal
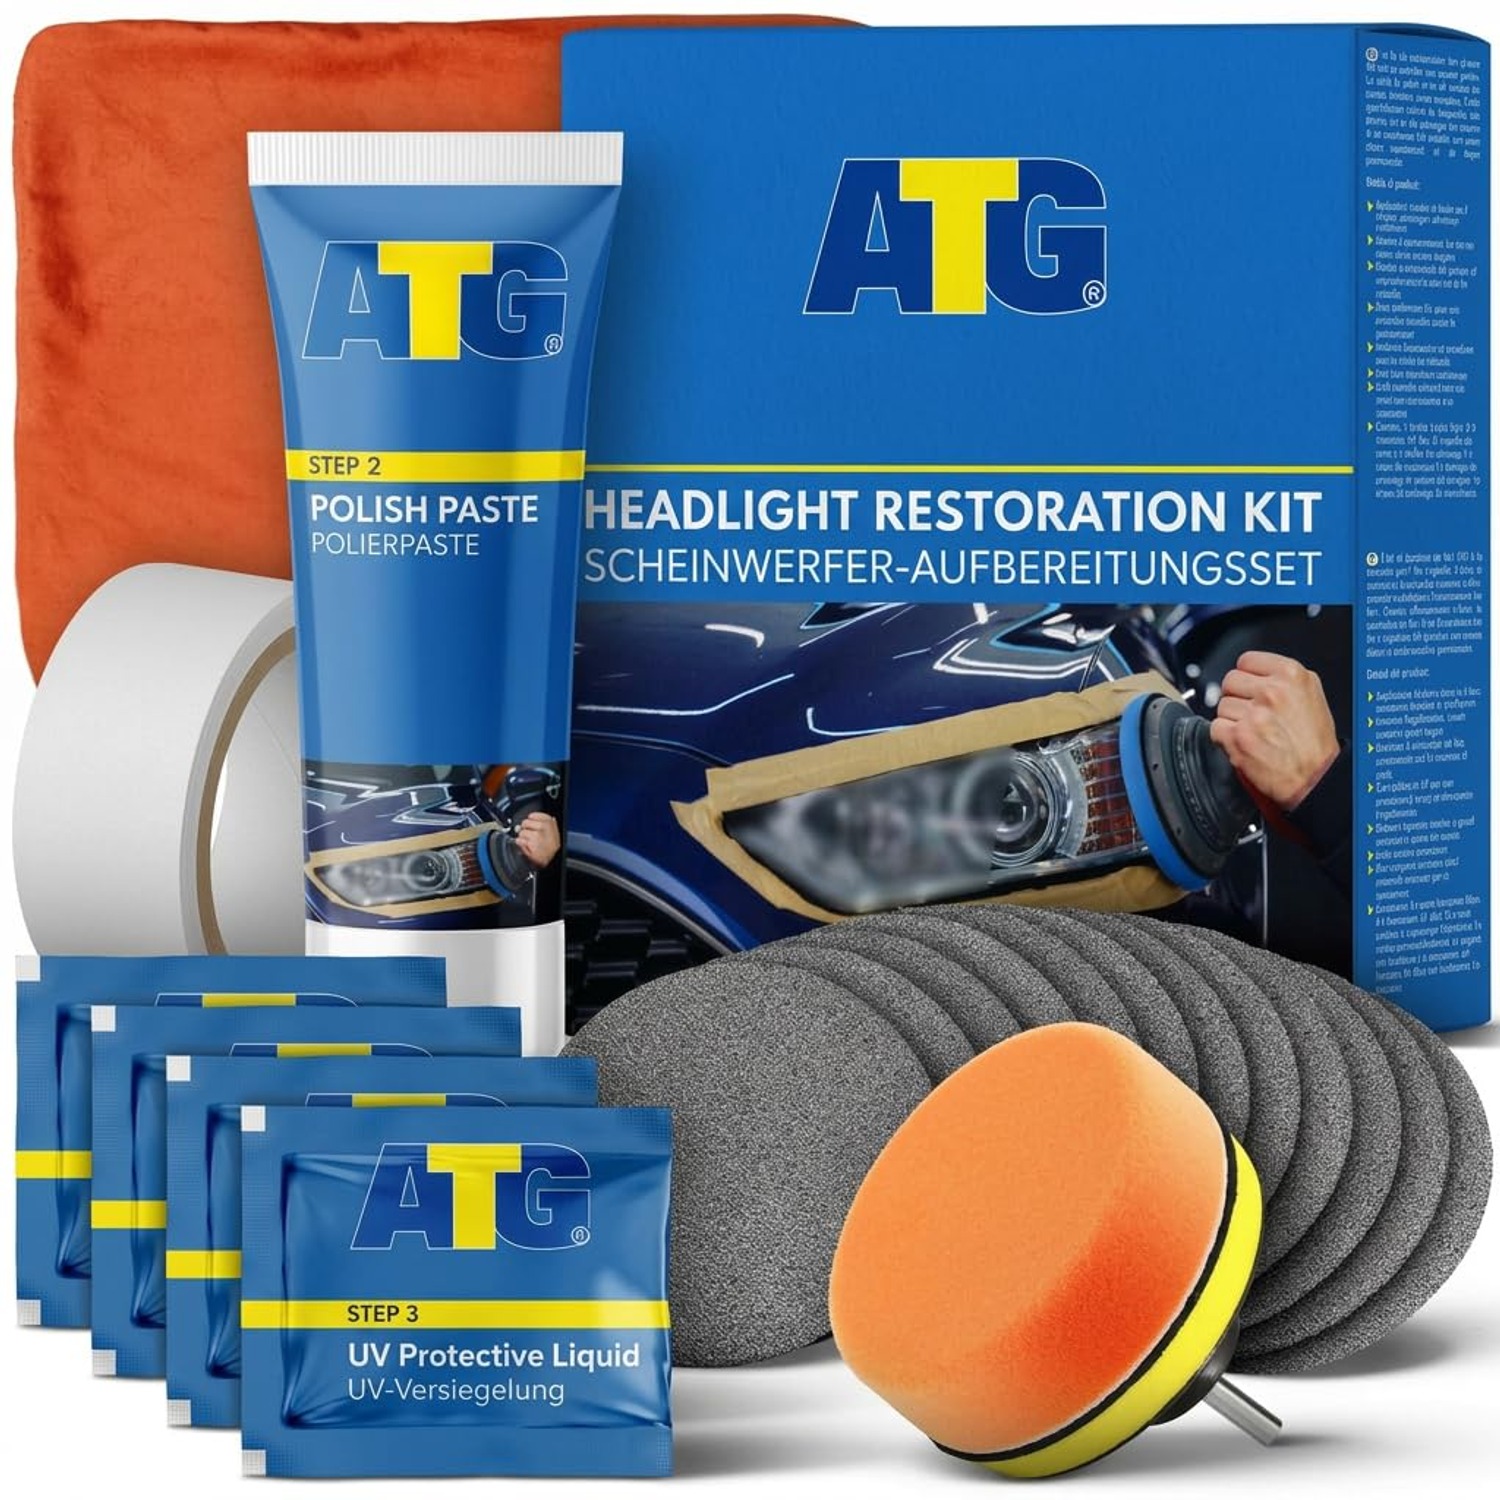
IncludedPolishing compound, polishing pads, UV headlight sealant
ApplicationHand application, no specialist tools required
SuitsPlastic headlight lenses with surface clouding or yellowing
ConditionNew
Shipping & returns

Tracked delivery anywhere in Ireland. It is free on orders of €100 or more, and a flat €25 below that. Allow up to 7 working days in transit after dispatch within 2 working days.

This shop's own returns policy gives you 15 days from purchase to change your mind, on every product it sells. Send it back in its original packaging with proof of purchase and we refund the price you paid for the goods, processed within 24 to 48 hours of the return arriving. You cover the cost of returning it unless the item is faulty.

If it arrives faulty, damaged or not as described, we put it right at no cost to you, return postage included, and your rights under Irish consumer law, including the Consumer Rights Act 2022 are unaffected.

Shipping details · Refunds and returns

Three Stage MethodClean the lens, polish with compound, then finish with the UV sealant.
No Power ToolsSupplied pads let you work by hand at your own pace.
UV Sealant FinishA protective top coat is applied over the polished lens.
Fits By Lens TypeSuits plastic headlight lenses that have gone cloudy or yellowed.

Bring back the clarity of cloudy, yellowed lenses with a headlight restoration kit you can use on the driveway in an afternoon.

Clean, polish and seal in three stages using the supplied compound, polishing pads and UV sealant, with no specialist power tools needed.

This headlight restoration kit is made for plastic lenses that have turned cloudy, hazy or yellow with age.

It works in three stages, cleaning the lens first, then polishing away the dulled surface layer with the supplied compound.

A UV sealant is applied last as the finishing coat over the freshly polished surface.

Polishing pads are included so the whole job can be done by hand without specialist equipment.

Results vary with the condition of each lens, so a small test area is always the sensible place to begin.

Plastic headlight lenses do not stay clear forever. Years of sunlight, grit, road salt and washing slowly break down the outer surface, and what starts as a faint haze turns into a milky, yellowed film. The lamp itself may be perfectly fine behind it. This headlight restoration kit is aimed squarely at that outer layer, giving you a way to work on it yourself instead of replacing the whole lamp unit.

The kit follows a simple three stage sequence. You clean the lens thoroughly so no loose dirt is dragged across the surface, then you use the polishing compound with the supplied pads to cut back the dull, degraded layer. Once the surface has been evened out and the haze is gone, the UV sealant goes on as a finishing coat over the polished plastic. Each stage has a purpose, and skipping one tends to show in the result.

Everything is designed for hand application. There is no requirement for a polisher, a rotary buffer or any workshop kit, which makes this a practical driveway job rather than something you book in. Work on one lamp at a time, keep a steady rhythm and give yourself enough daylight to judge how the surface is changing as you go.

Preparation matters more than people expect. Mask the paint and trim around the lamp with tape before you start, because the compound is meant for the lens and not for the bodywork beside it. Test on a small, less visible section of the lens first so you can see how that particular surface responds before you commit to the whole thing.

Be realistic about what can and cannot be fixed. Surface clouding and yellowing sit on the outside of the lens and can be worked on. Deep cracks, moisture trapped inside the housing or damage behind the lens cannot be reached from the outside, and no amount of polishing will change that. The condition of the lens you start with largely sets the result you finish with.

Not sure yet? That is fine.

You can change your mind. This shop's own returns policy gives you 15 days from purchase to send it back in its original packaging with proof of purchase, and we refund the price you paid for the goods.

If it turns up faulty, damaged or not as described, that is on us. We pay the return postage and you can have a repair, a replacement or your money back, and your rights under Irish consumer law, including the Consumer Rights Act 2022 are unaffected. Read the full detail on our refunds and returns page, or ask us anything before you order.

Frequently Asked Questions

What does this headlight restoration kit actually do?

It targets the degraded outer layer of a plastic headlight lens, the part that has gone cloudy or yellow. You clean the lens, polish that layer back with the supplied compound and pads, then apply the UV sealant as a finishing coat. It works on the surface of the lens, not on anything inside the lamp.

What comes in the kit?

The kit contains polishing compound, polishing pads and a UV headlight sealant. These are the items needed to carry out the clean, polish and seal sequence by hand.

Do I need a power tool or polisher?

No. The supplied pads are intended for controlled hand application, so the job can be done on a driveway with no specialist equipment. Working by hand also gives you more control over pressure and lets you check progress as you go.

Will this work on my car?

Suitability is based on lens type rather than on any particular vehicle. The kit is intended for plastic headlight lenses showing surface clouding or yellowing. We cannot say it fits a named vehicle, so check the material and condition of your own lenses first.

How long does the job take?

That depends on how dull the lenses are and how carefully you work. Most people set aside an afternoon so there is no need to rush any stage. Doing one lamp at a time is usually easier than trying to work on both at once.

Can it fix a cracked headlight?

No. Cracks sit through the plastic rather than on the surface, so polishing cannot close them. This headlight restoration kit is for surface clouding and yellowing only.

What about moisture inside the lamp?

Condensation or water inside the housing is an internal issue, usually caused by a failed seal or vent. Nothing applied to the outside of the lens will reach it. That needs to be looked at separately before any restoration work is worthwhile.

Should I mask the paint first?

Yes, we strongly recommend it. Use masking tape around the edge of the lamp so the compound stays on the lens and away from paintwork and trim. It takes a few minutes and saves a lot of bother later.

Should I test it somewhere first?

Always test on a small, less visible section of the lens before doing the whole surface. Every lens has aged differently, so a test patch shows you how yours responds. If you are happy with the test area, carry on across the rest.

How cloudy is too cloudy?

There is no fixed cut-off. Light to moderate surface haze and yellowing are the usual candidates for a headlight polishing kit like this. Heavily degraded lenses may improve less, and the result always depends on the starting condition.

Why does the sealant stage matter?

The sealant goes on as the finishing coat once the lens has been polished. Applying it is part of the intended three stage method, so leaving it out means the job is not complete. Follow the stages in order for the result the kit is designed to give.

Can I use the polish on other plastic parts?

The kit is described as a headlight cleaner kit for headlight lenses, so that is what it is intended for. If you want to try it elsewhere, test a hidden area first. We cannot make claims about surfaces outside the stated use.

How long will the result last?

We do not state a duration, because sun exposure, climate, washing habits and parking conditions all differ. Lenses on a car kept outdoors in strong sun will behave differently to one parked in a garage. Re-doing the process later is always an option.

Can I use it on glass headlights?

The kit is aimed at plastic lenses, which are the ones that cloud and yellow over time. Glass lenses age differently and are not the intended target. Check which material your lamps use before buying.

Does this involve sanding?

The method described here is clean, polish and seal using the supplied compound and pads. Follow the sequence as supplied.

What is the best way to clean the lens first?

Wash the lens with car shampoo and clean water, then dry it fully. The aim is to remove loose grit so nothing is dragged across the plastic during polishing. A clean starting surface makes the polishing stage far more even.

Can I do this in direct sunlight?

It is easier in shade or on an overcast day. Working on a hot lens makes products dry faster than you can spread them evenly. A cool, dry lens gives you more working time.

Can I do this in the rain?

No. The lens needs to be clean and dry at each stage, especially before the sealant goes on. Pick a dry day or work under cover.

Do I need gloves?

Gloves are sensible when handling any car care chemical, and they keep compound off your hands. Follow the instructions supplied with the product. Keep the kit away from children.

How do I store the kit afterwards?

Keep the bottles upright with the caps closed tightly, in a cool, dry place out of direct sunlight. Rinse the pads with clean water and let them dry before putting them away. Stored properly, leftover product stays usable.

Can I use the pads again?

Rinse them thoroughly in clean water after use and allow them to dry fully. Pads that still hold compound residue will not work as cleanly next time. Replace any pad that has become hard or badly worn.

Is this suitable for a complete beginner?

Yes, it is designed as a DIY headlight restoration job rather than a workshop task. The three stages are straightforward and done by hand. Take your time, mask the paint and test a small area first.

Will it work on tail lights or indicators?

The kit is described as a headlight restoration kit, so headlight lenses are the intended use. Other plastic lenses may be a different material or finish. If in doubt, test an inconspicuous spot.

What if the haze is on the inside of the lens?

Internal haze cannot be reached with any external product. This car lens restoration kit works on the outer surface only. If the clouding is inside the housing, the lamp needs attention from a different angle.

Does this kit include bulbs?

No. It is a cleaning and polishing kit for the lens itself. Bulbs are a separate item and nothing in this kit affects them.

How long will delivery take?

We dispatch within 2 working days. Delivery then takes up to 7 working days by tracked courier, anywhere in Ireland. It is free on orders of €100 or more and a flat €25 below that, shown in your cart before you pay. You get a tracking number by email once the parcel is dispatched.

Can I return it if I change my mind?

Yes, unopened items in original condition can be returned under our standard returns policy. Get in touch with our team and we will guide you through it. Please keep the packaging until you are sure.

What if the kit is not right for my lenses?

If you open it and realise your lenses have cracks, internal moisture or damage the kit cannot address, contact us and we will help you work out the next step. We would rather point you in a sensible direction than have you spend an afternoon on something that will not improve. Our team can talk through what the kit can and cannot do before you start.

Is there a warranty?

No separate warranty is sold. Irish and EU consumer law applies in full, and faulty items are put right. Contact us with your order number and a photo and we will sort it out.

Can I ask a question before I order?

Yes. Send us a photo of your headlight lens and tell us what you want to fix, and we will tell you honestly whether this is the right product before you buy.

The Complete Buyer's Guide to Headlight Restoration Kits

6 min read Online Auto Company

The slow fade nobody notices until it is obvious

Headlight lenses do not go cloudy overnight. They dull a little each season, and because you see your own car every day, the change slips past you. Then one evening you park next to a newer car, or you see a photo of your own vehicle from a few years back, and the difference is impossible to unsee. The lenses have gone from clear to hazy, with a yellow-brown tint sitting over the surface like old varnish.

What has happened is on the outside. Most modern headlight lenses are made from a tough plastic, and that plastic is finished with a protective coating. Sun, grit, road salt, detergents and years of weather gradually wear that coating down. Once it starts to break up, the plastic underneath is exposed and begins to oxidise. That is the milky layer you are looking at.

The lamp behind it is often untouched. The housing is sound, the bulb is doing its job, and the only thing standing between you and a clear lens is a thin degraded layer on the surface. That is the gap a headlight restoration kit is designed to fill.

How a restoration kit works

This kit follows a three stage sequence, and each stage has a job to do.

The first stage is cleaning. You wash the lens properly and dry it, because any loose grit left on the surface will be dragged across the plastic the moment you start polishing. That causes fine scratching and uneven results. It is the least interesting step and the one people most often rush.

The second stage is the polishing compound, worked in with the supplied pads. This is where the real change happens. The compound cuts back the dull, oxidised layer, evening out the surface so light passes through it cleanly again. You will see the pad pick up a yellowish residue as you work, which is exactly what you want. Keep going until the haze is gone and the surface looks consistent across the whole lens.

The third stage is the UV sealant. Once the lens has been polished, the fresh plastic surface is bare, so the sealant goes on as the finishing coat. This is not an optional extra tacked on at the end. It is part of the method, and the job is not finished until it has been applied.

Because the kit is built around hand application with the supplied pads, there is no need for a rotary polisher or any workshop equipment. That makes it a realistic driveway job. It also gives you something a machine does not, which is a direct feel for how much pressure you are using and a constant view of how the surface is changing.

Who this kit suits

This is for someone with plastic headlight lenses that have gone cloudy or yellow on the outside and who would rather spend an afternoon on the driveway than replace a lamp unit. It suits older cars that have spent their lives parked outdoors, cars being prepared for sale, and anyone who simply likes the car to look cared for.

It also suits people who have never done any detailing before. There is nothing technical about the sequence. You clean, you polish, you seal. The skill is in patience rather than technique, and a beginner who takes their time will usually get a better result than an experienced person who rushes.

It does not suit every situation, and it is worth being clear about that. If the lens is cracked, polishing will not close the crack. If there is water or condensation sitting inside the housing, that is an internal problem caused by a failed seal or blocked vent, and no product applied to the outside can reach it. If the damage is behind the lens rather than on it, the same applies. A headlight polishing kit works on the outer surface and nowhere else.

Setting your expectations honestly

The single biggest factor in your result is the condition of the lens you start with. Light to moderate surface clouding tends to respond well. Heavy, deeply degraded plastic may improve noticeably without becoming perfectly clear again. We are not going to promise you a particular outcome, because we cannot see your lenses.

This is exactly why a test patch matters. Pick a small, less visible section of the lens, work the compound into it, and look at the result. That little patch tells you more about what your lenses will do than any description can. If the test area comes up well, carry on with confidence. If it barely shifts, you have learned something useful before spending an afternoon on it.

Masking is the other piece of preparation worth doing properly. Run masking tape around the edge of the lamp so the compound stays on the lens and off the surrounding paint and trim. It takes a few minutes, and it removes the one thing that commonly goes wrong with DIY headlight restoration.

Getting the best from the job

Pick the right day. Shade or an overcast afternoon beats hot direct sun, because a hot lens causes products to dry before you have spread them evenly. The lens also needs to be dry at every stage, particularly before the sealant goes on, so a wet day is not the day for this.

Do one lamp at a time. It is easier to keep track of where you are, and having the untouched lamp beside you gives you a direct comparison as the polished one improves. That comparison is genuinely motivating halfway through.

Work methodically rather than quickly. Cover the whole lens evenly, including the edges and the curved sections that catch less light. Uneven polishing shows up most on the outer corners, which are the parts people tend to skim over.

When you reach the sealant stage, follow the product instructions exactly. The finishing coat is what completes the process, and applying it to a clean, dry, freshly polished lens is the whole point.

Looking after the kit and the result

Store the bottles upright with the caps closed tightly, somewhere cool and dry and away from direct sunlight. Rinse the pads in clean water after use and let them dry fully before putting them away, because compound residue left to harden makes them far less useful next time. Keep everything out of reach of children.

As for the lenses themselves, how long they stay clear depends on things we cannot predict. A car that lives outdoors in strong sun faces a harder time than one parked in a garage. Washing habits and climate play a part too. We do not quote a duration, and you should be wary of anyone who does. What we can say is that the process can be repeated later if the surface starts to dull again.

The short version

A headlight restoration kit is a practical answer to a common, cosmetic problem. Cloudy and yellowed plastic lenses are usually suffering from a worn outer layer, and this kit gives you the compound, pads and UV sealant to clean, polish and seal that surface back by hand.

It will not mend cracks, it will not dry out moisture inside the housing, and it will not reach damage behind the lens. What it will do is let you work on the outer surface yourself, at your own pace, without specialist tools. Mask the paint, test a small area, take your time with each stage, and judge the result against the condition you started with. For a lot of older cars, that is a very satisfying afternoon's work.

Browse the shop

Not sure if your lenses can be saved?

Tell us what your headlights look like and our team will give you an honest answer before you buy.

Ask us a question

Page summary

The Headlight Restoration Kit is a hand applied car care kit for plastic headlight lenses that have become cloudy, hazy or yellowed on the outer surface. It uses a three stage method. The lens is cleaned, the dulled surface layer is polished back with the supplied polishing compound and pads, and a UV sealant is then applied as the finishing coat. No specialist power tools are needed. Suitability is determined by lens type rather than by vehicle, and results depend on the starting condition of each lens. Deep cracks, moisture inside the housing and internal damage cannot be addressed from the outside.